24 creative photography projects for 2024
It's time to bid farewell to 2023 and say hello to 2024! The new year is always a great time to start afresh and to reassess your ambitions and aims for the year. As well as thinking of the personal changes you want to make, you can also think about what you want to achieve from your photography - and we are here to help you do just that.
To get you started, we've curated 24 fabulous photo projects for you to try throughout the year. The aim is to tackle one project every fortnight so you can explore different genres and use different skills that will help you grow as a photographer.
To make it easier to follow, we've themed the projects into seasonal categories, starting with winter, but mix and match as you see fit. You can also adapt our suggestions to suit your own shooting and editing style - feel free to put your own creative stamp on them!
Creative photography projects for winter 2024
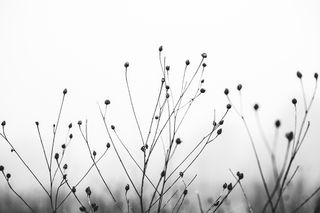
Project 1: Fabulous flora
You may think that spring and summer are the best times of year to take stunning garden shots, and while this is true, the winter garden also has plenty of photographic opportunities.
Look for structural and skeletal plants such as dead thistles or cow parsley to shoot as your main subject. Remember to get down low to compose your shots. Bring along a bag or old cushion to save your knees from getting dirty and wet on the ground.
- Convert your images to black and white.
This style of photography lends itself to the monochromatic medium as your winter garden shots should all be about the form and structure of the plant.
- Isolate your subject. Think about your background and how to make your subject stand out. A wide aperture setting will help you do this.
- Consider how you are going to present your image.
A double or triptych can work well.
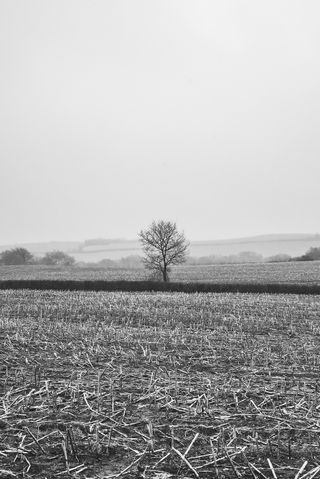
Project 2: Bleak landscapes
Instead of waiting for the perfect golden hour, embrace the dull weather by shooting bleak and minimal landscapes this winter. Misty conditions are ideal and use negative space to aid your composition. This type of project can be shot in both rural and urban locations, so wherever you live, you can achieve great results.
Trees work particularly well as a main subject, but so do man-made structures such as water towers and industrial power plants. Have a look at the works of Hilla and Bernd Becher and Josef Koudelka for some inspiration.
- When converting your image to black and white, it's easy to over-boost the contrast and make the blacks too dark and the whites too light. Pulling it back a little will let the image speak for itself.
- A wide-angle lens is useful for this style of photography.
- When it comes to composing your image, as well as using the rule of thirds, you can also think more symmetrically.
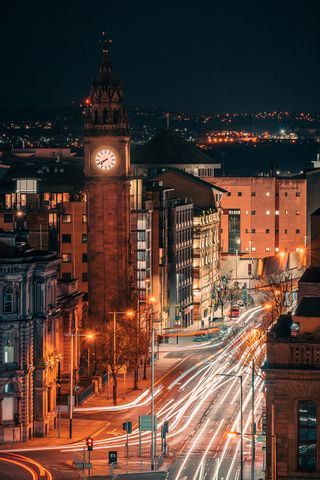
Project 3: Light the way
Winter months are the perfect time to shoot light trails.
Head out into the urban environment or look for a busy and interesting piece of road for your location. Essential kit includes a tripod, high-vis (if you stand near a road) and a wide-angle lens. Experiment using different shutter speed settings (starting at 30 seconds) to see how they add to the final effect.
The speed of the traffic and the number of vehicles will also affect the result.
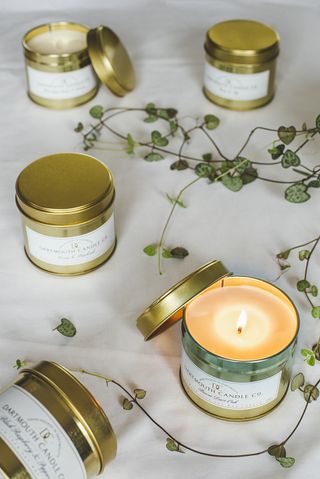
Project 4: Serene still-life
On those days when it's freezing cold or the rain is hammering down and you can't face the outdoors, find some household objects to create a simple still-life setup. In our example, we used some candles as our main subject and draped a household plant around to add some interest to the shot. Your background choice is also important as this sets the feel and tone of the image.
Project 5: Creative portraits
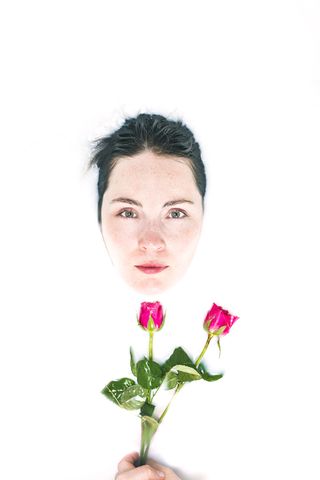
This project is easy to do at home but it will require some planning, milk (around six liters), a model and flowers, although these are optional.
We shot our image using flash and elevated our position above the model using a step ladder. Make sure you have your camera strapped and secured to your body to avoid any accidents. To create the milky effect, fill your bath about halfway with warm water and then add the milk.
If you don't want to use fresh milk, you can also use milk powder.
- Bounce the flash to achieve a clean look. You want to avoid heavy or distracting shadows.
- If you're going to add floating flowers to the milk, add these after your model is in position; otherwise, they will go underneath the water as your model gets into the bath.
- Once you've added the milk, the water cools down reasonably quickly - be ready to shoot so that your model doesn't get cold!

Project 6: Festive bokeh
Bokeh comes from the Japanese word boke, which means blur or haze. In photography, you can achieve an easy bokeh effect using a lens that can be opened to a wide aperture setting - the wider the better, so prime lenses are ideal.
You will also need some lights in the background, and small lights work best, so Christmas trees are perfect for this type of effect.
Creative photography projects for spring 2024
Project 7: Bring spring indoors
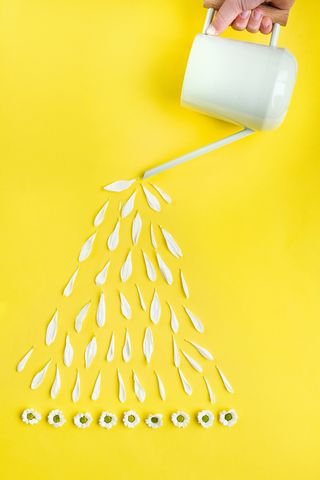
When the first signs of spring start to emerge, we all seem to breathe a sigh of relief... However, we are also aware that April showers can go on way beyond April, so on those rainy days, bring the spring indoors. A flat lay is a great way to do this and can be achieved in a few easy steps.
Set up the background
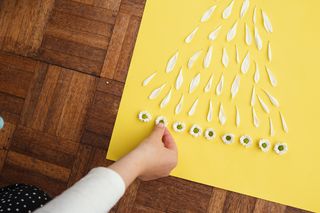
Lay down a piece of coloured card on a table and place it next to a large window.
As you want to make your image bright and vibrant, colored card will work best.
Bounce the light
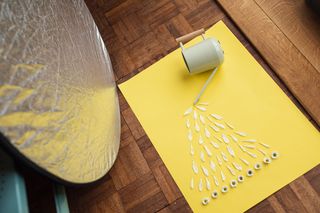
To reduce the shadows, place a reflector on the opposite side to your main light source. This lifts the image and removes the stronger shadows for a more even result.
Set up your camera
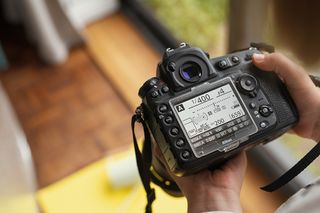
Put your camera into Aperture Priority mode and set the aperture to f/4 and the ISO around 200. You can either shoot this handheld or on a tripod if your shutter speed is too slow.
Project 8: Animal portraits
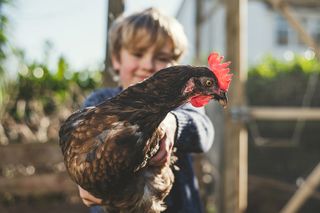
Many animals are born in the spring, so take advantage of this to create some characterful animal portraits.
For a winning shot, keep the focus on the eye or the face of the animal to create a connection between the subject and the viewer. Animals can be tricky to work with (especially those that aren't domesticated) so be patient and keep shooting to ensure you get a winning shot.
Project 9: The Bartocha technique
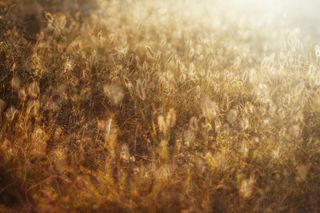
Sandra Bartocha was one of the first to invent this popular technique where you layer images on top of each other (often nature images) to create a beautiful effect. To achieve this, shoot multiple images of your subject at different focus points and then build your image using an editing software program like Photoshop[1], where you can blend multiple layers together.
Project 10: Garden lifestyle
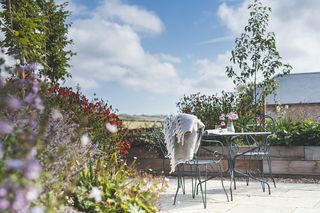
The spring garden is the perfect setting for a lifestyle project.
Although this shot looks as though it has been taken candidly from behind the flowers, it has in fact been carefully composed and thought through to sell the dream. Placing items such as a blanket and a magazine on the table adds that lifestyle element to the scene and enables the viewer to picture themselves in that setting.
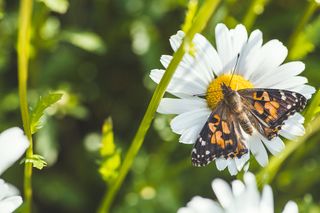
Project 11: Beautiful butterflies
By late spring, many different varieties of butterfly are starting to hatch. To shoot our spring butterflies, we grew them ourselves.
We ordered some caterpillars from Insect Lore (insectlore.co.uk) and watched them grow from caterpillars into Painted Lady butterflies - this is also a particularly interesting project to do if you have children. When we released the butterflies into our garden, they were completely docile, meaning we could spend time getting them into a good position.
- Head to your back garden or the local park and look for flowers (such as the daisies in our example) or for interesting backdrops where the butterflies can rest.
- Use a long lens such as a macro 100mm prime for best results.
- When shooting at a close proximity, your aperture setting is affected. For example, our images were shot at f/8, which on a wide-angle image would be sharp from front to back.
For our butterfly images, f/8 was the perfect setting as it softened the background while keeping some of the butterfly sharp, which was the effect we were after.
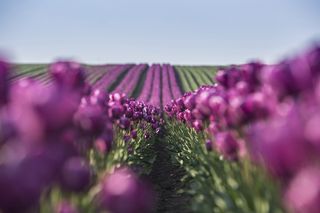
Project 12: Wide and shallow
As spring leaps into action, you'll find fields of flowers starting to bloom. Our instinct and habit when we shoot a wide-angle shot is to set the aperture to a narrow setting to keep the scene sharp from front to back. On this occasion, however, you should do the exact opposite.
Open your aperture to a wide setting and blur the background and foreground. This works best in-camera if you have a lens that can go as wide as f/2.8. However, if you don't have an f/2.8 optic, shoot as wide as you can and then exaggerate the blur effect at the editing stage.
- Look for a colorful setting.
Fields of tulips or lines of flowers are the perfect arrangement for this technique (lavender fields also work in the summer months).
- Think about where you want your focus to sit in the image. About a third of the way up often creates a pleasing result.
- Plan your shoot to coincide with good weather. Avoid the brightest part of the day and opt to shoot in softer light at the beginning or the end of the day.
Creative photography projects for summer 2024
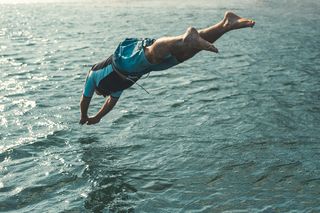
Project 13: Splash and shoot
Jumping into the sea or a large body of water is great fun to do and you can get some eye-catching photographic results at the same time.
To make sure your shots are sharp, set your camera to fire in the fastest burst mode you have and ensure your AF setting is set to the tracking feature, so you can follow your subject. You may need to get your model to do a few jumps to get the perfect shot.
- It's all about communication. Speak to your model first to tell them where they need to jump so you can be ready to get the action shot.
- Shoot a sequence of images and either pick the best of the bunch or present them as a sequence.
- Sea salt and cameras do not mix!
Protect your camera with a waterproof cover and keep it clear of any big splashes. A long lens will help you get close to your subjects.

Project 14: Divine drinks
Cold drinks on a hot summer's day make the perfect combination for a winning photograph. Not only is it better to shoot into the light here, but you also want to make sure your drinks are ice-cold so that they bubble with condensation, which adds to the overall effect.
- Think about your setting and how that adds to the overall look.
In the summer, an outdoor setting such as a garden is the best way to go.
- Open your aperture to a wide setting to blur the background and isolate your subject.
- Bring in additional props to add interest to the corner or side of the frame, but make sure they don't become the main focus. Here, we used a pair of sunglasses as a prop.
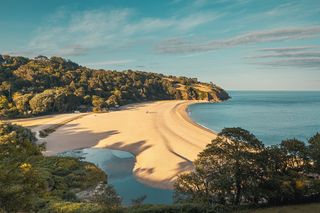
Project 15: Summer scenes
The first or last light of the summer day are the best times to shoot spectacular summer scenes. Blackpool Sands in Devon, pictured here, were shining as the sun set behind the fields.
Shoot in raw format and bring those warm tones back into your image at the editing stage to make the most out of it.
- Calm and still days are the ideal settings to shoot scenes like the one below. Have a recce beforehand to work out the best spot from which to compose your shot.
- Use a wide-angle lens to frame the full scene and look for curves and shapes in the landscape to help you with your composition.
- At the editing stage, bring some detail back into the shadows. You may also need to warm the shadows up as the light is much cooler there compared with the rest of the scene.
Project 16: Perfect portraits
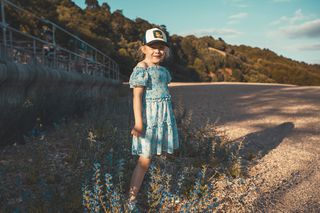
The long summer days are blissful and at the start and end of the day, the light begins to soften meaning you can achieve excellent results with your portraits.
Coordinate your sitter's clothing to match the scenery. In our example, the girl's blue flowery dress matches the flowers on the ground perfectly. We've also added a creative filter and toned the image to make every element in the scene work together.
- Have fun and engage with your subject as you are shooting.
Although it might be tricky to think about camera settings while directing a model, you should make sure they are comfortable.
- If working with children, you need to be quick as they won't stand still for long. To hold their attention, do your research first - find out their interests so you can engage with them for longer.
- Keep the focus fixed on the face, but if shooting closer up, focus on the eyes.

Project 17: Capture fun at a festival
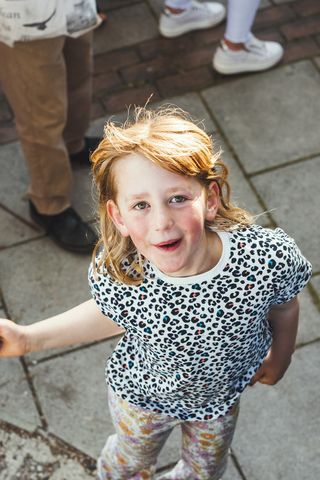
If you like people-watching and listening to loud music, there's nothing better than photographing a music festival. These images were taken for the Dart Music Festival last summer and are the perfect example of how to get great results...
Look for light
Photography is all about finding the best light and this is also the case at a festival or an event.
Natural or ambient lighting can be used to your advantage so look for opportune moments with your subject in the setting.
Crowd fun
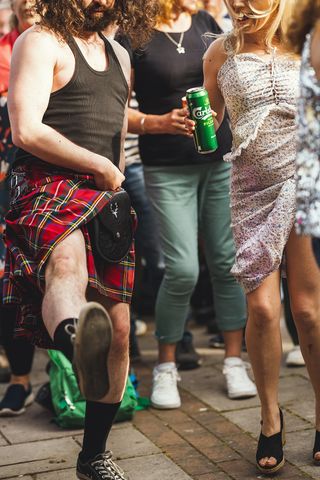
As well as photographing the musicians at a music festival, there are lots of images to be captured in the crowd. Look for fun moments, especially when people are unaware of your presence for a more candid and natural result.
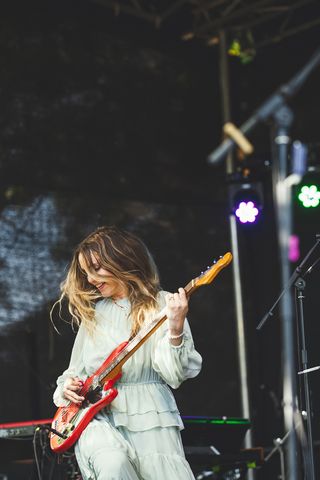
It's all about being ready to capture the perfect moment. A shake of the head or someone jumping in the air are always winners.
Keep your ISO above 800 to ensure your shutter speed is fast enough to freeze the action.
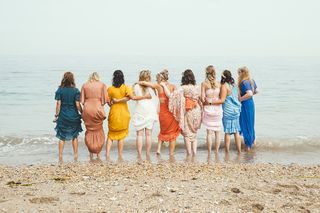
Project 18: Shoot big group photos
Shooting a large group of people is never easy so think of fun ways you can get them to engage with each other. People feel a lot less awkward if they have something to do or are given good direction. These colorful bridesmaids naturally formed around their bride, creating the perfect lineup for a group picture.
Luckily, it was a hot day so it didn't take much encouragement to get them to paddle in the water! Make sure you keep your aperture setting around f/8 so everyone in the frame stays sharp.
Creative photography projects for fall 2024

Project 19: Fall close-up
As well as offering plenty of opportunities for wide-angle shots in the fall, the small details of the season are also a joy to photograph. Look for slithers of light to frame your subject and when it comes to editing your images, follow our steps for atmospheric results.
We think Lightroom[3] is one of the best image-editing software programs for toning and styling your images, so we opted to use this.
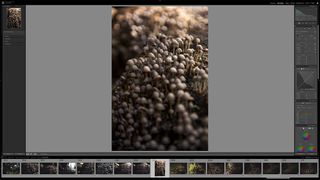
Open Lightroom
Import your images and then go to the Develop Module. Start by adjusting the controls in the basic tab. Correct the Exposure and White Balance, boost the Contrast and use the Whites, Blacks, Shadows and Highlights sliders to tone your image.
Also, play around with the Tone Curve setting below for further effects.
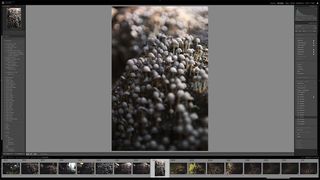
Profiles and presets
Profiles and presets are easy ways of toning and styling your image and are a great starting point. You can create your own or import them. There are plenty of profiles and presets for sale on the internet.
We added a touch of a profile called Soft Fade as the base for our image. You can adjust the amount applied by any profile or preset using the Amount slider - sometimes a hint is all you need.
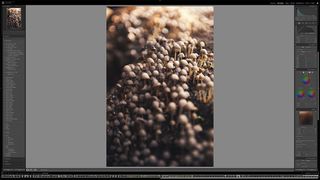
Color grading
Now take it a step further and go to the Color Grading feature. This enables you to color-tone the mid-tones, highlights and shadows separately.
Start by picking your color, for example, warmer mid-tones and highlights and cooler shadows; you can then adjust the amount added by clicking further out on the circle. Again, less is more, so have a play around for subtle results like ours.
Project 20: Location portraits
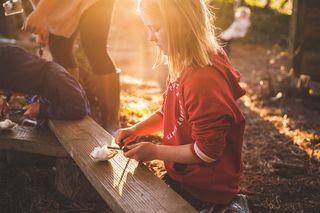
Although landscape photographers search for that perfect autumnal light, portrait photographers also do the same when out on location. This image taken of a girl at an outdoor adventure club is the perfect example of what a setting sun in autumn can bring to an image.
- Keep your camera in Aperture Priority mode and knock the exposure meter down a stop to ensure your highlights aren't overexposing.
- Shoot into the light, keeping the focus on your subject.
- Color is important for a shot like this so think about what you want your subject to wear.
In our example, the red jumper is perfectly matched to the light conditions.
Project 21: Shoot abstract architecture
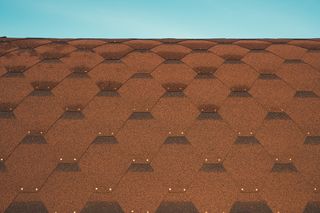
Sometimes less is more, such as in this example of an image of a beach sauna. The contrast of the patterned orange tiles placed against a clear blue sky is what makes it such an effective result. You don't need to go far to find this type of image, so have a search around your local area to see what you can find.
Project 22: Still-life around the home
If you need a day at home, you can still take great photographs.
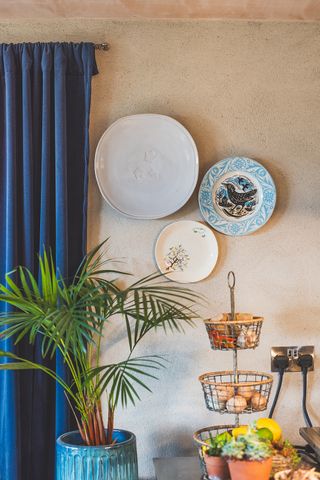
The home has plenty of areas you can style, from living room areas to a shelf and dresser in the bedroom. If you have busy surfaces, remove the clutter and style your shots using a few books, plants, candles, blankets, cushions or whatever you have lying around... it's also a good excuse to have a clean and sort out household items at the same time.
- Use a tripod as you want to keep your ISO down low to ensure your shots aren't grainy. Using a tripod indoors enables you to keep your ISO low, at 100, as you will need to use a longer shutter speed.
- Unless you have a library of beautiful old books that all match in color and style when shooting books, turn them around so you can't see the spine to create a neutral look.
- For scenes where you have a big difference between the highlights and shadows of the image, try bracketing exposures and merge the shots at the editing stage.
Project 23: Fire and food
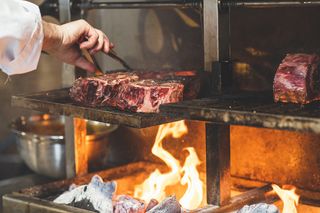
Smoky and fiery conditions are perfect for food photography in action.
Look for flames created by dripping meat to capture effective results. When it comes to selecting the right camera settings, don't be afraid to push the ISO up if you are shooting in low light. Here, we set ours to 1600 and the aperture at f/2.8 to get a shutter speed of 1/400 sec.
This meant the action of the flame and the hand stayed sharp.
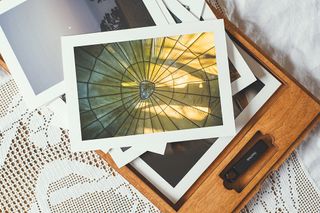
Project 24: Present your photos
On those rainy days later in the year, take time to reflect on your photography, go through and organise your photos and edit them accordingly.
Try printing out some of your images, thinking of different ways to present them, and if you need to share images with a client or a friend then find a pleasing presentation method, such as the wooden box in our example, or frame your favorite photos of the year and hang them on a wall.